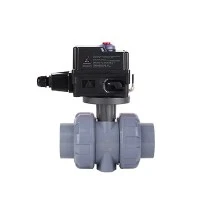
Selection of installation location
1. Fluid flow consideration
- The installation direction of the check valve must be consistent with the normal flow direction of the fluid. This is the most basic and most important point. Most check valves have arrow marks on the valve body to indicate the flow direction of the fluid. When installing, make sure that the arrow direction is the same as the actual desired flow direction of the fluid. For example, in a water supply pipeline, if the installation direction is wrong, the check valve will not only fail to prevent backflow, but will hinder normal water flow, causing the pipeline system to fail to work properly.
- There are also requirements for the installation location of horizontal and vertical pipelines. When installing in a horizontal pipeline, it is necessary to ensure that the valve disc can be flexibly opened and closed under the deadweight and fluid force. In a vertical pipeline, the check valve is generally installed on a pipeline where the medium flows from bottom to top, so that the rising force of the medium can be used to help the valve disc open, and when the medium stops flowing or flows back, the valve disc can be quickly closed under the action of gravity.

2. Installation near equipment or key nodes
- Try to install the check valve near the equipment that needs to be protected (such as water pumps, compressors, etc.), preferably close to the outlet of the equipment. Taking the water pump as an example, installing the check valve directly after the outlet of the water pump can prevent the fluid from flowing back at the first time and minimize the damage caused by the backflow to the water pump. In some chemical processes, the check valve that prevents the mixing of different media should be installed before the key node where the two media may meet to ensure that each medium can flow in the expected direction to prevent mutual interference and mixing.
Preparation before installation
1. Check the quality of the valve
- Carefully check the quality of the check valve before installation. Check whether the appearance of the valve is damaged, such as whether the valve body has cracks, sand holes, and whether the valve disc is deformed. These defects may affect the normal operation of the check valve, causing leakage or failure to effectively prevent backflow. For example, if the valve disc is deformed, it may not fit the valve seat tightly, and thus cannot completely prevent the backflow of the fluid.
- Also check whether the specifications of the valve meet the design requirements. This includes the caliber, pressure rating, etc. of the valve. If the caliber does not match, it will make it difficult to connect the pipeline and affect the flow of the fluid; if the pressure rating does not meet the requirements, the valve may rupture and other dangerous situations in a high-pressure environment.

2. Clean the pipeline system
- Before installing the check valve, the inside of the pipeline must be cleaned. Debris in the pipeline (such as welding slag, rust, mud, etc.) may enter the inside of the check valve and affect the normal opening and closing of the valve disc. For example, welding slag may get stuck between the valve disc and the valve seat, causing the valve to close loosely, thereby causing the check valve to lose its function of preventing fluid backflow. Cleaning the pipeline can be done by blowing, flushing, etc., to ensure that the inside of the pipeline is clean and free of foreign matter before installing the check valve.
Key points in the installation process
1. Correct connection method
- There are many ways to connect the check valve to the pipeline, such as threaded connection, flange connection, welding, etc. The selection of the appropriate connection method should be determined based on factors such as the material, pressure level, and valve specifications of the pipeline. For low-pressure and small-diameter pipelines, threaded connection may be more convenient; for high-pressure and large-diameter pipelines, flange connection or welding connection is more reliable. When performing the connection operation, strictly follow the corresponding operating procedures to ensure that the connection is firm and the seal is good. If it is a flange connection, pay attention to the selection and installation of the flange gasket. The gasket should be able to withstand the pressure and temperature of the fluid in the pipeline, and the gasket should be placed flat during installation to avoid leakage points.
- When welding, pay attention to controlling the welding quality to avoid deformation of the valve due to welding stress. After welding, the weld should be subjected to nondestructive testing, such as X-ray flaw detection, ultrasonic flaw detection, etc., to ensure that the weld quality meets the requirements.
2. Debugging and inspection after installation
- After installation, the check valve needs to be debugged and inspected. First, an opening and closing test should be conducted to observe whether the valve disc is flexible by manual operation or by using a small flow rate of the fluid. The valve disc should be able to open quickly and be able to close tightly when the fluid stops flowing or flows back. If the valve disc is found to be inflexible, it may be caused by foreign matter inside the valve or improper installation, which requires timely inspection and treatment.
- Also check the sealing performance of the check valve. You can apply a certain pressure on one side of the valve (such as using a pressure test pump) to observe whether there is leakage on the other side. If there is leakage, it may be that the seal between the valve disc and the valve seat is not tight, and the seal needs to be readjusted or replaced. In addition, before the system is officially put into operation, a full flow operation test should be conducted to observe the operation of the check valve under normal working flow to ensure that it can meet the requirements of the system.